The game map
In this part you put everything from part 13 together into one bigger program: a puzzle game. A robot works in a warehouse. Boxes stand on the floor, some squares of the floor are marked as targets, and the robot's job is to push every box onto a target. It can push a box one square at a time, but it can't pull one, so a box pushed into a corner stays there for good. Puzzles like this are known as Sokoban, Japanese for "warehouse keeper".
Each step of this module adds a piece to the game: the map in this step, then the robot, then the boxes, and last the move counter, restarting and winning. Every step ends with the whole game so far, and you can play it right in the page.
Tiles
The map is made of tiles: small square pictures that fit together side by side, like the tiles of a floor. These three are 40 by 40 pixels each:

floor.png, 40 × 40 pixels
wall.png, 40 × 40 pixels
target.png, 40 × 40 pixelsThe map as data
Before it can draw anything, the program needs to know what the room looks like. That's data, and a list of strings describes it well: one string for each row of squares, one character for each square. Here # is a wall, . is floor and X is a target:
LEVEL = [
    "#########",
    "#...#...#",
    "#.....X.#",
    "#...#...#",
    "#..X#...#",
    "#.......#",
    "#########",
]

print(len(LEVEL), "rows")
print(len(LEVEL[0]), "squares in a row")
print(LEVEL[2])
print(LEVEL[2][6])7 rows
9 squares in a row
#.....X.#
XA list of strings works like a list of lists here: LEVEL[2] is the row at index 2, and LEVEL[2][6] is the square at index 6 of that row, a target. Notice the order: the row comes first. In the map you write LEVEL[y][x], where y counts the rows from the top and x the squares from the left. pygame does it the other way round: a point in the window is (x, y), x first. Both are normal, so keep an eye on which one you are writing.
Keeping the map as data pays off right away. To change the room, you edit the strings, and the code that draws it stays the same.
Drawing the map
Square (x, y) of the map goes x * 40 pixels from the left edge of the window and y * 40 pixels from the top. Two loops, one inside the other, go through the rows from top to bottom and the squares of each row from left to right, and a dictionary gives the tile for each character:
import pygame

SIZE = 40
ROOM = [
    "######",
    "#..X.#",
    "#....#",
    "######",
]

pygame.init()
window = pygame.display.set_mode((len(ROOM[0]) * SIZE, len(ROOM) * SIZE))
tiles = {
    "#": pygame.image.load("wall.png"),
    ".": pygame.image.load("floor.png"),
    "X": pygame.image.load("target.png"),
}

while True:
    for event in pygame.event.get():
        if event.type == pygame.QUIT:
            exit()
    window.fill((0, 0, 0))
    for y in range(len(ROOM)):
        for x in range(len(ROOM[y])):
            square = ROOM[y][x]
            window.blit(tiles[square], (x * SIZE, y * SIZE))
    pygame.display.flip()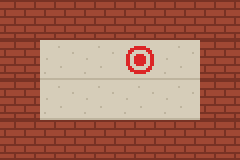
The window as text
fill (0, 0, 0)
blit wall.png at (0, 0)
blit wall.png at (40, 0)
blit wall.png at (80, 0)
blit wall.png at (120, 0)
blit wall.png at (160, 0)
blit wall.png at (200, 0)
blit wall.png at (0, 40)
blit floor.png at (40, 40)
blit floor.png at (80, 40)
blit target.png at (120, 40)
blit floor.png at (160, 40)
blit wall.png at (200, 40)
blit wall.png at (0, 80)
blit floor.png at (40, 80)
blit floor.png at (80, 80)
blit floor.png at (120, 80)
blit floor.png at (160, 80)
blit wall.png at (200, 80)
blit wall.png at (0, 120)
blit wall.png at (40, 120)
blit wall.png at (80, 120)
blit wall.png at (120, 120)
blit wall.png at (160, 120)
blit wall.png at (200, 120)
The window's size comes from the map too. A map 6 squares wide and 4 high gets a window of 240 by 160 pixels, and a bigger map would get a bigger window without any other change.
The game as a class
The game will grow to about a hundred lines, with many parts that use the same data: the map, the pictures, the window, and soon the robot. A class keeps all of it together in one object, and its methods split the work into parts with names. Here is the start of the game, with the real map:
import pygame

SIZE = 40
LEVEL = [
    "#########",
    "#...#...#",
    "#.....X.#",
    "#...#...#",
    "#..X#...#",
    "#.......#",
    "#########",
]


class BoxGame:
    def __init__(self):
        pygame.init()
        self.load_pictures()
        self.map = LEVEL
        self.height = len(self.map)
        self.width = len(self.map[0])
        self.window = pygame.display.set_mode((self.width * SIZE, self.height * SIZE))
        pygame.display.set_caption("Box Robot")
        self.clock = pygame.time.Clock()

    def load_pictures(self):
        self.tiles = {
            "#": pygame.image.load("wall.png"),
            ".": pygame.image.load("floor.png"),
            "X": pygame.image.load("target.png"),
        }

    def run(self):
        while True:
            self.handle_events()
            self.draw()
            self.clock.tick(60)

    def handle_events(self):
        for event in pygame.event.get():
            if event.type == pygame.QUIT:
                exit()

    def draw(self):
        self.window.fill((0, 0, 0))
        for y in range(self.height):
            for x in range(self.width):
                square = self.map[y][x]
                self.window.blit(self.tiles[square], (x * SIZE, y * SIZE))
        pygame.display.flip()


if __name__ == "__main__":
    game = BoxGame()
    game.run()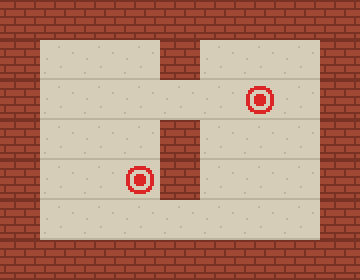
The window as text
fill (0, 0, 0)
blit wall.png at (0, 0)
blit wall.png at (40, 0)
blit wall.png at (80, 0)
blit wall.png at (120, 0)
blit wall.png at (160, 0)
blit wall.png at (200, 0)
blit wall.png at (240, 0)
blit wall.png at (280, 0)
blit wall.png at (320, 0)
blit wall.png at (0, 40)
blit floor.png at (40, 40)
blit floor.png at (80, 40)
blit floor.png at (120, 40)
blit wall.png at (160, 40)
blit floor.png at (200, 40)
blit floor.png at (240, 40)
blit floor.png at (280, 40)
blit wall.png at (320, 40)
blit wall.png at (0, 80)
blit floor.png at (40, 80)
blit floor.png at (80, 80)
blit floor.png at (120, 80)
blit floor.png at (160, 80)
blit floor.png at (200, 80)
blit target.png at (240, 80)
blit floor.png at (280, 80)
blit wall.png at (320, 80)
blit wall.png at (0, 120)
blit floor.png at (40, 120)
blit floor.png at (80, 120)
blit floor.png at (120, 120)
blit wall.png at (160, 120)
blit floor.png at (200, 120)
blit floor.png at (240, 120)
blit floor.png at (280, 120)
blit wall.png at (320, 120)
blit wall.png at (0, 160)
blit floor.png at (40, 160)
blit floor.png at (80, 160)
blit target.png at (120, 160)
blit wall.png at (160, 160)
blit floor.png at (200, 160)
blit floor.png at (240, 160)
blit floor.png at (280, 160)
blit wall.png at (320, 160)
blit wall.png at (0, 200)
blit floor.png at (40, 200)
blit floor.png at (80, 200)
blit floor.png at (120, 200)
blit floor.png at (160, 200)
blit floor.png at (200, 200)
blit floor.png at (240, 200)
blit floor.png at (280, 200)
blit wall.png at (320, 200)
blit wall.png at (0, 240)
blit wall.png at (40, 240)
blit wall.png at (80, 240)
blit wall.png at (120, 240)
blit wall.png at (160, 240)
blit wall.png at (200, 240)
blit wall.png at (240, 240)
blit wall.png at (280, 240)
blit wall.png at (320, 240)
__init__prepares everything: pygame, the pictures, the map, a window that fits the map, its title and a clock.load_picturesputs the tiles in a dictionary, so the picture of a square isself.tiles[square].runis the main loop. It handles the events, draws the window and ticks the clock, over and over. Nothing in this puzzle moves by itself, butself.clock.tick(60)still keeps the loop from drawing thousands of frames a second for nothing.handle_eventsonly closes the window for now. The next step teaches it the arrow keys.drawfills the window and draws every square again, on every frame.
Creating the game object doesn't start the game: game.run() in the main block does. That keeps the two apart, so a game can be created and its data looked at without starting the loop.